I made my first piece of clothing on the Sentro! It’s a rustic looking piece, made from all hand spun yarn and finished off this week with ribbing knitted by hand (yes, I am allowed to knit again). I used all the left over balls of naturally dyed yarn I had laying around in my stash, you may recognise some of the colours from my ’50 shades of beige’ dye series.
The process was quick and simple; I made two panels (like this) that were 40 stitches wide and long enough to go from the front edge, over my shoulder and down to the back edge. I then mattress stitched the two panels together up the middle, leaving a space for my head. A seam up each side, leaving a space for the arm holes finished the stitching part of the project.
Finally, I picked up the stitches from the bottom edge, removed the waste yarn and knitted a ribbed edge using 6mm circular needles. I repeated this for the neck and sleeves.
I have worn this vest to work and to town already. I love the feel of it on my skin and it makes me feel so self sufficient. I think I will have a go at making a jumper with sleeves next.
On my walk this morning I found a lovely surprise. I was walking along slowly, much to the disgust of my puppy; Henry, when I saw a small brown lump at the edge of the path. This brown lump was a pisolithus arrhizus otherwise known as a Dead Man’s foot. This unassuming little sphere gives lovely rich browns and russet tones to wool in the dye pot… apparently. I picked it up and put it in my pocket. Of course I forgot to get a photo of it before bringing it home.
The brownish ball at the front of the photo is my Dead Man’s Foot fungus (such a charming name). The avocado skins and seeds are drying for future use as dye stuff.
I cut my prize in half and put a pot of water on to boil straight away. The two halves of the mushroom were just thrown in and plonked on the wood stove to boil.
You can see the immature spores at the top, they look like little golden spheres. The brownish powder is the mature spores.
After about an hour of boiling, The pot had a lovely deep brown colour. Most fungas dyes are substantive (meaning they don’t need a mordant to stick to wool), so I just wet my last skein of home spun wool yarn and popped it into the dye pot (in a paint bag to protect it from dyestuff).
The yarn was in the dye bath on the stove (at a steady simmer) for two hours. Then I let it cool, before taking the yarn out of the pot.
The colour wasn’t as dark as I wanted, so I popped it back in, along with an avocado seed as a mordant (avocado seeds contain tannin, which acts to mordant and slightly darken wool).
After another two hours simmering, it was taken off the heat and left to cool. Eventually, I washed the yarn in clean water and spun it out. The final colour is glorious! Variable browns and russets and a sneaky flash of yellow.
I love the colours in this yarn. The yarn is a loosely plyed two ply from some merino fleece I was given long ago. From now on I will be searching the ground for these fungus as I walk, they are apparently fairly common in the Autumn and Winter.
Update: I found another one this morning!
This one is huge. You can also see the remains of the first one, I fished it out and plan on saving it to use again.
This is where I found the first one; growing out of the hard soil of the track.
I found the second one here in the soil at the edge of the road. The puppy is Henry, our newest baby. Look for an origin story soon.
Update: This year’s Dead Man’s Foot fungus dye is very yellow. I do love the golden glint this gives the yarn.
A new interest has floated into my mind over the usual holiday down time: lichen dye for wool. I have noticed that a lot of lichen grows on old fence posts beside the road. That started me thinking about what it is good for (as it turns out, quite a lot). I was driving home from a doctor appointment yesterday and began to notice the large amount of furry fence posts beside the road (much to the unease of the cars behind me, who must have been worried about my erratic steering and low speed), so I eventually pulled over and went to take some photos and collect samples to play with. I collected a couple of handfuls of lichen from a dead tree and took it home to play with.
Usnea
After a fair amount of internet sleuthing, I found a likely candidate: Usnea. I also found some other lichens (that I left in place for now).
Some other lichens.
It seemed to be a natural progression to make this handful or two of squishy goodness into dye, so I found a YouTube video to show me how it is done and off I went…
I plonked the whole two handfuls in a pot with water and put it on to simmer for an hour or so. Some videos say it can be boiled, some say to not boil it, some say to boil it then cool and boil again, some say once is enough. I will just play it by ear and simmer until I get some colour, and if that doesn’t work, I will boil it.
Apparently this species of lichen is also really antibacterial and can be used to treat infections on the skin. I think I will also harvest some to dry and keep on hand in my herb collection.
Yes, I did get two different types of lichen in my harvest.
Now I wait.
After about two hours of gentle simmering, I decided to try boiling as there wasn’t a lot of colour showing in the water.
After two boiling sessions the pot is showing an uninspiring yellow/brown. I can see some orange tones in it, but I don’t think I have enough lichen for the pot to make orange. I will see what my wool does.
Some sources say that wool needs to be mordanted and some say that mordant can actually interfere with the process. I am going with the no mordant camp for my first skein (mostly because I’m impatient to see what I get from the lichen). Usually the wool is soaked in water before being plonked into the dye bath, but I just put the skein in dry (due, again, to impatience).
Strained dye bath, looking a lot like aged pee.In it goes.Now we wait, again.
I am heating up the dye bath again, to increase the dye uptake. I will leave the pot on the stove for an hour or so, then I will let it all cool down and see what we get.
The result?? Beige.
The resulting beige colour is not that inspiring, but I can still see dye in the pot. I am going to dig out my iron mordant pot and see if adding iron to the pot will improve the colour a bit.
Yes, I know it looks gross, but it is really useful in dye pots.
I have added 4 tablespoons full of the iron mordant. The colour has improved straight away. I will leave the yarn for another half hour then see what I get.
Much better.The final result.
After rinsing the yarn and hanging it to dry, I have ended up with a really pretty orange/brown. I think that I will iron mordant a few more skeins and gather some more Usnea (a lot more). I can imagine a pair of socks knitted in this colour.
I learned today that Usnea species gives a brown/orange colour in dye, that iron mordant brings out the orange tones in this dye and that I have my father’s ability to drive while thinking about things (that is… no ability at all). I will continue to gather and experiment with lichens and fungus in the dye pot, but I had better spin some new yarn to play with before I get too carried away.
wow…I have such a lot of yarn. Hand made, recycled and gifted, you name it, I have it. In my push to make more room in my seriously overcrowded craft room, I bought one of those fancy cube storage units (yes, it was a wrench to part with that much cash and yes, I did find a second hand one on GumTree the day after I bought it). We put it together one day after work, when we were both tired and cranky (which accounts for the fairly large ding in the wood of the bottom piece). We are still married, so I think we passed the IKEA test, the one where you have to put together some modular furniture as a team before you decide you are compatible.
This photo was taken after I started making bins for the spaces.
Once the unit was up and in place I went looking for a pattern for those attractive and useful fabric storage bins. I found heaps and was really looking forward to making a dent in my fabric stash when I ran across a problem; interfacing. I don’t usually use it at all, and all the patterns say I need something to stiffen the sides of my bins (makes sense). So off I went looking for an alternative. Soon I found a clip of a woman making storage bins from old clothes, she used rice bags as interfacing…and that’s when I had my lightning-strike-to-the-brain idea. Why couldn’t I use old feed bags as interfacing? They would be noisy and crinkly, but that doesn’t matter for something that will spend most of it’s life sitting on a shelf. The bags are prone to breaking down in the sun, but they would be covered by fabric, and indoors. The poly bags may be slippery and hard to sew, I found some posts about people using them to make bags, so it is possible. I decided to give it a try.
I found this YouTube tutorial to use as my basic pattern idea, I just made them bigger.
First step was to make my pattern; I wanted cubes that were about 30cm square, so I made a simple net pattern out of newspaper.
I used my newly organised fabric draws to find some fabric for these boxes.
I ended up with some interesting options. I’m not the sort of person who worries about things matching.
Next I cut out pieces for the outside and lining of my boxes.
I cut some pieces of feed bag to use as interfacing.
Then it was a simple matter to sew up the bins as instructed by the tutorial.
So far I have five done. My plan is to make a bin for every space in the cabinet and store all my yarns in them. There are still three huge plastic boxes full of yarn to go.
Some tips I have discovered along the way; use grain bags not chaff bags, the weave is too loose on chaff bags and they fray really easily.
The chaff bags fray a lot.
The grain bags are easy to sew and give a good amount of stiffness to the bins, but they are just a bit too small for the 30 cm square bins. I sticky taped two together to get a sheet big enough, it seems to have worked.
This bin is made with the grain bags.
So far I have really enjoyed this project. Hopefully my yarns will be visible and usable once it is finished.
I have been using soap nuts to wash our clothes for a while now. I am really happy with the results; it cleans the clothes, takes out the sweat smells without adding any other scent and removes most of the stains. I also don’t have to rinse, therefore saving 50% of the washing time and water. I wanted to transfer those benefits to washing/scouring fleece for spinning, so I went googling of course (when did ‘googling’ become a verb?). There was only one reference to using soap nuts to wash fleece (that I could find anyway); Sheep Cabana blog. The post says to use them in place of the usual squirt of detergent. Another adventure begins.
I have MANY bags of fleece to spin. I always seem to collect more than I can comfortably spin in a year, even though I promise myself I won’t get any more until I spin what I have. Recently I looked at Eli (Freida’s companion, and best friend now) and saw that he has a good long fleece, all ready for a spring shearing. He is a Merino/Dorset cross, which means his fleece is fairly strong with a good crimp, but it should be soft enough for socks and gloves.
My go-to book when learning about new fibre types.Eli will, hopefully, have wool that is slightly on the fine/soft side of this scale, thanks to his Merino ancestry.
Spring is only three months away, and with the spring comes usable fleeces from my sheep. I am setting myself a challenge; to clear some of the fleece piled in my craft room to make room for them. Usually, I wash, card and spin small, manageable lots. This time I’m trying my hand at bulk processing; I will wash a lot of fleece, then card or comb a lot of fleece, and finally spin, ply and wash a lot of yarn.
First, the washing;
This is the brand of soap nuts I buy. I hope to grow my own one day though.I put a cup full of soap nuts into a saucepan with about two litres of water and bring it to the boil.The resulting liquid; after I strain off the soap nuts. I use about half a cup of this liquid to wash clothes in but I think I will use a full cup for washing wool.This is the pile of fleece to be washed; about a kilo in total.
Scouring fleece is a matter of simply making a fairly hot bath with detergent of some kind (in this case; soap nuts) and soaking the fleece in it. I use lingerie washing bags to hold my fleece because it makes fishing the soaked fleece out so much easier and I can just hang the whole bag on the line to dry. The trick is to avoid felting the fleece; I don’t agitate it at all, just push it under the water and I try not to change the temperature of the water quickly. This fleece took two soaks in the soap nut solution to come clean (it was a very greasy fleece), but it did come clean. After it is soaked, I throw the bags into the spinner of the washing machine and spin out the excess water. The bags are then hung on the line to dry.
A close up of the dirt and lanolin in the fleece.A close up of the fleece after washing and drying.There is now just over a kilo of fleece sitting in my ‘to-do’ basket waiting to be carded for spinning.
The soap nut/fleece scouring experiment is a success. I can now wash piles of fleece using soap nuts and not have to feel guilty about releasing all that detergent into my environment. I would definitely recommend using soap nuts for washing clothes and/or fleece.
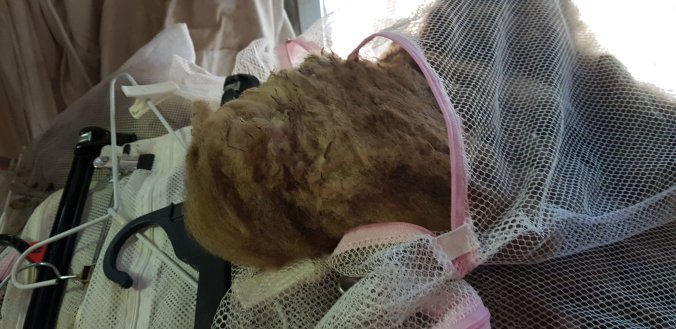
I have been spinning a lot lately (whenever there is time), mostly from a coloured merino fleece I picked up somewhere. The yarn is lovely and fine, but what to do with it all? So I decided to make some little knitting bags; the kind you can hang over your wrist and knit from, or stick your needles into and shove in your handbag when you realise the bus is pulling over at your stop (or is that just me?). I will spin the yarn, knit and full the bags then pop a ball of my yarn and some knitting needles into it and sell my ‘knitting starter kits’ at the markets (offering a free knitting lesson at point of purchase). I don’t know if anyone will take me up on it given the heat at the moment, but we will see.
My little bags don’t really have a pattern, it’s more of a knit-by-feel affair, but I will try to explain the process (with photos of course). First I find some spare homespun wool that I have been wanting to use for something and turn it into a neat little ball by putting it on my yarn swift and winding it off with the ball maker thing.
I then cast on some stitches, enough to make a decent square. For this bag I used 20 stitches and knitted a square base using garter stitch (knit every row). The square has to be big enough to fit a ball of wool on plus about 40% (to allow for shrinkage when fulling).
A knitted square. I just love this yarn; caramel alpaca plied with gold thread
I pick up stitches around the sides of the square, trying to pick up the same number as my cast on side. The number of stitches on each side is not really crucial to success, but it does make things neater and easier to finish.
I knit in rounds to make the sides until the bag is deep enough to hold a ball of wool, bearing in mind that fulling (or felting) makes the piece shrink, so adding about 40% to all measurements.
My bag is coming together
Now comes the tricky bit; handles. I have just discovered the Japanese knot bag design, and it suits the knitting bag design I have in mind. All I need to do is knit handles with one being shorter than the other…right?
This photo from the internet shows the design I mean
My little bag is a mini version of the one in the photo (knitted rather than cloth too), so the longer handle only needs to be long enough to loop around the wrist. I knit the handles by casting off until I reach a corner, knit some handle stitches (in this one I made them six stitches wide) then slip those stitches onto a stitch holder. Now I continue casting off until I reach the next corner. I do this all the way around until there are four sets of handle stitches (on stitch holders). Then I knit back and forward on one set of stitches using garter stitch until it is long enough to loop over to the handle stitch set beside it (that is the next set along tracing around the perimeter). I graft the handle onto the handle stitches using the three needle cast off. The other two handle stitch sets are done the same way but this handle is long enough to go over a wrist (plus 40%).
Now the knitted part of the bag is finished, it is time to full or felt it.
Fulling is easy; just throw the bag in the washing machine with some detergent (I use shampoo actually) and let it wash for a few minutes. Fibre felts at different rates, so the fulling process may be really fast (if I used Icelandic wool yarn), or it may be very slow (if I used Suffolk wool yarn), but it will felt (as long as the fibre is wool and is not super wash treated). Alpaca is a medium speed felter, so it took about 15 minutes.
The bags I have made so far in the washing machine ready to felt
The finished bbag with a ball of wool and needles inside, ready to go. As you can see the bag shrunk quite a bit.
So now it’s back to spinning more wool from that merino fleece.
For my next adventure into rare and/or old breed wool I decided to give Icelandic a spin (pun intended). I bought about 200g from a lovely lady on Facebook, it arrived as a neat little plait of combed roving with a picture and some breed information on the label. The skein smelled delightfully of sheep; warm, earthy and somehow mouth watering (the artist in this article had the same reaction to the smell of Icelandic wool).
The good old Vikings seem to have really loved their sheep and took them everywhere they went. It seems that once they landed in Iceland they had very little contact with the wider world (the sheep not the Vikings, they went on to conquer other countries and found more sheep breeds) and the breed has remained ‘unimproved’. The Icelandic is known as the oldest and ‘purest’ breed of sheep because cross breeding has been banned in Iceland for many generations, keeping the genetics the same as they have been for the past 1100 years (except for naturally occurring mutations of course).
The tops in my little plait is a mix of both inner and outer coat (or tog and thel if you prefer) making my yarn a lopi type yarn. Lopi yarn is made by blending both layers of Icelandic fleece together and lightly spinning them to produce a soft, airy but long wearing yarn. The yarn I produced is not particularly loose-spun, I tend to make firmly twisted yarns, but it did blend into a lovely uniform grey and is fairly soft.
I decided to card the tops again to blend the colours together a little more
The rolags are very springy and soft
Icelandic spins up into a hairy yarn. I did try to spin with less twist, but my instinct is to add more
I plyed my yarn loosely and ended up with a lovely soft grey yarn
I did discover that Icelandic wool felts very easily; I carried my plait of tops around with me to various locations while I was spinning and it seems that rubbing up against the plastic bag felted some bits of the outside. The felting carded out…thankfully, but it did remind me to be extra careful when washing my finished yarn.
I don’t know whether to sell my yarn on my stall or…
After only two weeks of cocooning the moths are beginning to emerge. At the point of writing this I have two male moths with many more to come. Males are easy to identify because they have well formed wings and smaller bellies, they also hold their bottoms in the air and flutter their wings regularly to attract females (they make a sort of twerking motion with their bottoms too). At this point I am just trying to keep the remaining worms fed and find a place for the emerging moths, but I did find I couldn’t resist processing just two of the now empty cocoons.
This is the hole in the end of the cocoon made by the emerging moth
Many more cocoons waiting to be emptied.
I got so excited that I didn’t take photos, so words will have to do. First I made sure the cocoons were empty by checking for the hole in the end. Then I heated some water on the stove in an old saucepan. I added a teaspoon of my home made laundry gel (more on this recipe at a later date) which is basically pure soap and washing soda with a few drops of eucalyptus oil. The teaspoon was more than enough for my two cocoons, I will add more cocoons to the next lot I process. I let them simmer on the stove for half an hour (alongside the steaming veges for tea) then turned the heat off and let the water cool until I could reach in and scoop out the mass of silk. The two cocoons turned into a mass of tangled fibre in no time. Next I rinsed this mass under the tap until all the gel was removed and the yellow colouring had left the strands, I also picked out the left over skin and stuff from the cocoons at the same time. I haven’t organised a frame to stretch the cocoons onto yet so I just spread the fibre out as best I could and left it on the sink drainer to dry. When it was dry and a bit fluffy I took the opportunity to admire my first bit of peace silk fibre. Then I wacked the little mass on the carders and carded away for a few minutes until I had a passable rolag.
My first silk rolag
A close up of the fibre
Of course my moths are now busy mating and laying eggs for next year.
Next years silk worms.
The whole silkworm story is fascinating; from the huge effect silk has had on world trade, politics and even exploration to the interesting fact that there are at least three genus of silk moth and not all of them eat mulberries and the many myths surrounding the discovery and production of silk.
Here is an interesting article about the effect silk had on world trade in history.
I am finding this journey of discovery very interesting; silk is an amazingly beautiful fibre and like all fibre sources it requires a bank of specialised skills and knowledge to produce. There is so much more left to learn. Once all my moths have emerged and lay eggs I will be experimenting with processing the cocoons, I might even try to unravel some hatched cocoons in the traditional manner and see why it’s not considered to be viable.
Lately I have been thinking about learning to spin silk. I bought myself a small lot of beautiful roving and spun it up on my wheel. It was smooth and easy to spin, it produced a gorgeous, lustrous yarn that took the bright orange dye so well it looked almost glowing. So I decided that silk is my new love (when it comes to fibre) and ordered some cheaper silk hankies, because the roving is anything but cheap. Me being me, I wanted to do the whole process from scratch, not just buy roving and spin it. I want to be the whole machine, not just a cog in it. First I had to find out the details…
I did my usual research and read heaps of books and articles, watched how-to videos and discovered that the beautiful roving I so badly wanted to make came with a price even bigger than money; the pupa are boiled alive so they don’t damage the cocoons when they emerge as moths.That put me off the whole deal, until I discovered that there is a movement called ‘peace silk’ who’s practitioners let every moth hatch and process the cocoons into silk hankies or slubby (rough) roving. While the peace silk method does sound better as it doesn’t involve boiling babies it does leave me with another quandary; what to do with all those eggs. If every female moth mates and lays up to 500 eggs, then those eggs will either need to be destroyed or given away. I thought long and hard on the subject and decided that letting the moths emerge and lay eggs then destroying the eggs is more ethical as science does not consider eggs as living things (they are considered to be non-living things with the potential for life) although there is a lot of contention about this classification. Maybe this train of thought is just hair splitting, but I have to form an opinion one way or the other in order to proceed. Who knows, a better method may present itself in the future.
I found a listing on Gum tree for free silkworm eggs so my silkworm adventure began. The eggs came in the mail and as it had been a warm few days they immediately began to hatch. Luckily I had also ordered some silkworm chow (dehydrated mulberry leaf mush) as our mulberry tree was only just beginning to put on leaf. I made up some of the chow and fed the early arrivals.
The new babies are so tiny they are hard to see.
They grew fast, eating day and night until they were in danger of exploding out of their little box. When my tree had full leaf I began to feed them real leaves instead of the mush, they loved it and grew even faster. I found that the worms are more active and healthy when they eat leaves. So began a period of feeding twice a day on a big pile of mulberry leaves.
As you can see there are different ages in this lot. The eggs took a total of two weeks to hatch.
They are voracious eaters
Just when I was congratulating myself on keeping them all going…disaster struck. Stray cattle ate my mulberry tree down to the bare branches (including a very promising crop of fruit). Which left me begging friends and neighbors for leaves from their trees. Luckily this stage is almost at an end as my poor tree is growing more leaves. The worms eat about a shopping bag full of leaves per day, which is not small amount. I think I will have to plant a few more trees to keep up next year.
Some worms began making silk about eight weeks after the first hatching, this is a very long time to stay worms and I can only guess at the cause. Apparently the worms should start to spin after four weeks (or there about), but not having enough to eat and or colder weather can slow down the process. Maybe the silkworm chow was not enough for them, or maybe the weather was too cold. Possibly they have been bred to be worms for longer as they are now considered as pets by some people. Either way, they have begun to spin cocoons, so I built a spinning retreat for them.
My spinning retreat box. The toilet rolls are perfect for worms to spin in.
New residents getting ready to spin.
One worm decided to spin in an already occupied tube, but it’s best not to disturb them once they start to spin.
You can see the sheen on the cocoons
The sheen or glow stays with the yarn
I don’t know why my worms spin yellow cocoons, but apparently it washes out.
So far the silk making adventure has been fun and very satisfying. Once the cocoons hatch and I can process them the learning will really begin.
We have had a lot of rain recently (and our tanks are full) so of course all the fungal spores in the soil have taken advantage of this and popped up mushrooms and shelf fungus everywhere. There is a lot of information online about dying wool (and other protein fibres) with fungus, so I decided to have a wander around and see what I could find to experiment with.
In the bush around our humpy I found many kinds of fungus after just a cursory look; I haven’t tried to identify them as I am mostly interested in using them for dye. It’s not a great idea to eat mushrooms you aren’t able to identify, and I won’t do it. I will also be using gloves to process my collected bounty, just in case they prove to be toxic.
Below is a collection of photos of the fungal and lichen life I found in my little adventure.
The plan is to dry most of the current harvest for later experimenting. I couldn’t resist trying one little experiment though. I used a lovely brown shelf fungus I found on a dead tree with two tablespoons of washing soda to make an orange/ yellow dye pot. I simmered the pot of water, fungus and washing soda for an hour. Then I plonked in some merino home spun yarn and let it all cool overnight. After rinsing and drying I ended up with a golden yellowish coloured yarn that my daughter has named ‘You dirty sheep’, the name doesn’t do justice to the colour which is actually quite beautiful. I can’t wait to do some more experiments to see what I will get.
The little shelf fungus on the left gave the muted golden yellow of this yarn.


![20180115_130623[1]](https://i0.wp.com/chroniclesofahumpydweller.com/wp-content/uploads/2018/01/20180115_1306231.jpg?resize=676%2C901&ssl=1)
![20180111_153336[1]](https://i0.wp.com/chroniclesofahumpydweller.com/wp-content/uploads/2018/01/20180111_1533361.jpg?w=447&h=335&ssl=1 "20180111_153336[1]")
![20180111_154003[1]](https://i0.wp.com/chroniclesofahumpydweller.com/wp-content/uploads/2018/01/20180111_1540031.jpg?w=221&h=166&ssl=1 "20180111_154003[1]")
![20180111_154011[1]](https://i0.wp.com/chroniclesofahumpydweller.com/wp-content/uploads/2018/01/20180111_1540111.jpg?w=221&h=165&ssl=1 "20180111_154011[1]")
![20180111_175740[1]](https://i0.wp.com/chroniclesofahumpydweller.com/wp-content/uploads/2018/01/20180111_1757401.jpg?resize=676%2C507&ssl=1)
![20180111_181530[1]](https://i0.wp.com/chroniclesofahumpydweller.com/wp-content/uploads/2018/01/20180111_1815301.jpg?resize=676%2C507&ssl=1)
![20180112_140008[1]](https://i0.wp.com/chroniclesofahumpydweller.com/wp-content/uploads/2018/01/20180112_1400081.jpg?resize=676%2C507&ssl=1)
![20180112_140011[1]](https://i0.wp.com/chroniclesofahumpydweller.com/wp-content/uploads/2018/01/20180112_1400111.jpg?resize=676%2C507&ssl=1)

![20180112_150151[1]](https://i0.wp.com/chroniclesofahumpydweller.com/wp-content/uploads/2018/01/20180112_1501511.jpg?resize=676%2C507&ssl=1)
![20180112_204759[1]](https://i0.wp.com/chroniclesofahumpydweller.com/wp-content/uploads/2018/01/20180112_2047591.jpg?resize=676%2C507&ssl=1)
![20180112_204755[1]](https://i0.wp.com/chroniclesofahumpydweller.com/wp-content/uploads/2018/01/20180112_2047551.jpg?w=334&h=251&ssl=1 "20180112_204755[1]")
![20180112_204827[1]](https://i0.wp.com/chroniclesofahumpydweller.com/wp-content/uploads/2018/01/20180112_2048271.jpg?w=334&h=251&ssl=1 "20180112_204827[1]")
![20180113_161639[1]](https://i0.wp.com/chroniclesofahumpydweller.com/wp-content/uploads/2018/01/20180113_1616391.jpg?resize=676%2C901&ssl=1)
![20180113_173825[1]](https://i0.wp.com/chroniclesofahumpydweller.com/wp-content/uploads/2018/01/20180113_1738251.jpg?resize=676%2C901&ssl=1)

![20171209_201553[1]](https://i0.wp.com/chroniclesofahumpydweller.com/wp-content/uploads/2017/12/20171209_2015531.jpg?resize=676%2C507&ssl=1)
![20171209_201431[1]](https://i0.wp.com/chroniclesofahumpydweller.com/wp-content/uploads/2017/12/20171209_2014311-e1513714195486.jpg?resize=676%2C506&ssl=1)
![20171209_202434[1]](https://i0.wp.com/chroniclesofahumpydweller.com/wp-content/uploads/2017/12/20171209_2024341.jpg?resize=676%2C507&ssl=1)
![20171218_142304[1]](https://i0.wp.com/chroniclesofahumpydweller.com/wp-content/uploads/2017/12/20171218_1423041.jpg?resize=676%2C507&ssl=1)
![20171209_204825[1]](https://i0.wp.com/chroniclesofahumpydweller.com/wp-content/uploads/2017/12/20171209_2048251.jpg?resize=676%2C901&ssl=1)
![20171219_181317[1]](https://i0.wp.com/chroniclesofahumpydweller.com/wp-content/uploads/2017/12/20171219_1813171.jpg?resize=676%2C507&ssl=1)
![20171210_093417[1]](https://i0.wp.com/chroniclesofahumpydweller.com/wp-content/uploads/2017/12/20171210_0934171.jpg?resize=676%2C507&ssl=1)
![20171210_093422[1]](https://i0.wp.com/chroniclesofahumpydweller.com/wp-content/uploads/2017/12/20171210_0934221.jpg?resize=676%2C507&ssl=1)


