A banana circle/transpiration pit hybrid

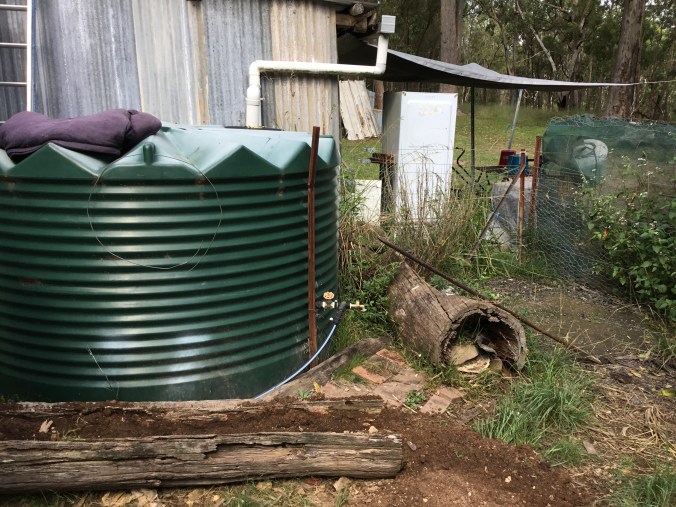
The photo below may not seem like much, but it is a HUGE leap forward for us. Please excuse the finger in the shot, I was in a hurry to get back to filling the trench. This photo represents a change in our water harvesting and disposal system.

Previously, our waste water from the kitchen ran out of the humpy into a trench in the soil and was allowed to spread out randomly from there. You can see the big clump of iris and weeds against the wall of the humpy which marks the start of the previous trench. This system created a mess of muddy trench and water sitting on the surface of the soil. I put in a lot of work, with help from family and friends, to dig a drain trench and put in some actual plumbing. While I was at it, I dug a trench for the effluent from the biogas unit too. This effluent previously went to a transpiration pit near the unit, but I wanted to extend the pit, so decided to plumb all our kitchen and biogas overflow into a banana circle.

What is a banana circle? It is a hole with bananas and other useful plants growing around the edge. Banana circles usually have a water source and the centre is used as a compost pile. This provides nutrients and water to the hungry crops and makes a little island of fertility.

Below you can see the beginning of my banana circle. The plumbing is in and I have dug a hole about a metre deep in the centre and piled the soil up around the edge. My circle is in a low place in the yard, so it will also channel rain water into it. Because it is being used as a transpiration pit, I was careful to dig the hole deep enough to (hopefully) prevent overflow during rain events.

I piled logs and sticks into the hole to provide something to soak up all that water and nutrient and hold it in dry times. I also added a layer of compost over the trench to give the bananas a fighting chance. I edged the piles with big pieces of branch to make an edge to mow against and to hold in the compost and mulch.

I planted my banana suckers (only two so far), some cassava cuttings and about 100 comfrey roots. Then I started to trim and weed the garden and pile up the centre of my circle. I will continue to pile up cuttings and garden scraps in the middle of the circle. The water in the pit should be covered by material at all times, so it will be a race to keep enough composting material in there as it breaks down (it might encourage me to weed more).

This little project has solved a problem (sloppy trench through the yard) and provided a place to grow food and medicine (bananas, cassava and comfrey). It also used up one pile of sticks and wood from the sheep paddock that needed to be cleared. I am very satisfied with my results on this project.

Planting potatoes – sort of gardening

It is now the full moon in August, which is my signal from the planet to plant potatoes. Since the fires six months ago I have lost a lot of my incentive to garden, but I am feeling the Springtime urge to get my hands dirty again. I have been maintaining the tiny patch of potted green in our front yard for a few months and it is planted out to the full extent of possibility, so potatoes will not fit.

Since the fire, (a lot of sentences start with that phrase now) I have become very aware of flammable material close to the humpy and gardens need a lot of flammable material to be fertile. To answer the conflicting urges to be fire safe and to grow some food, I decided to start planting staple crops out on the edge of the fire break in a little fenced off area with it’s own water supply (to be wet down in the event of a fire coming close). The fenced off area is yet to happen, but potato planting time is here, so I just ignored the lack of a fence and planted.

This year, I am trying the Ruth Stout method (sort of) and planting in hay mulch. As I am incapable of following any sort of instructions without modification (oppositional child here), I used the hay cleaned out of the animal pens to plant into.

The hay for planting is well traveled; it starts life here at the humpy as sheep fodder, we keep a round bale in the sheep night pen for midnight snacking purposes (which is why the vet says our sheep are heart attack risks). Once the sheep have eaten the bits of it they like, and pooped and peed into the other bits on the ground, the hay is raked up and used as bedding for rabbits, chooks, geese and the sheep. Once it is raked out of the pens (every two weeks or so), it is piled up to be used as mulch. This hay is now damp (with spilled water pots and pee) and filled with a variety of fertility boosting poops. It is also starting to break down into compost.

A random potato planting.

I began the potato planting with a little row of eight tubers in the designated area for planting staple crops; near our new cardboard/mulch hole. More potatoes will join these ones in a mulched field around the compost hole. My partner is going to move one of the fire fighting tank units up to this patch so that the hole and the mulched garden can be wet down really well when a fire threatens.

Yes, it looks like a dump.

The compost hole is huge; at least five metres across and about two metres deep. The purpose of this hole is to hold (and compost) any materials that are waste from the humpy, but will break down into nutrient rich compost (eventually). In there are broken furniture, cardboard, floor sweepings, paper (from cage cleaning, so covered in poop), natural fibre clothes, old or damaged fleece, hair clippings, etc. All the things we used to dump in the chook pen to be turned into compost are now thrown into the hole. The idea is that eventually (in a few years time) we will have a huge ‘pot’ of compost to plant fruit trees into. I don’t know if this will work, but I am willing to give it a go.

The herb beds…er…logs and a new bed

Note: you may notice that the first part of this post was made in the days when we had rain. The second part is in the current situation of deep drought. This is because I got distracted by other pursuits and didn’t get to finish the post. Because I hate to waste anything, I thought I would just update the post with some photos of the current state of the area.

Read on…

Living in the bush as we do, wood is easy to come by, we use it for everything; burning as fuel, structural building material, even in the garden. I have several hollow logs cut in half placed around one of the water tanks that were always intended to become herb beds. Unfortunately I sort of lost interest in the project for a year or two and they have sat there, looking messy ever since. I guess it is time to tackle that problem opportunity.

AA655229-BEB0-4E25-B247-08B90D768DD7

First of all the weeds have to go. I need to clear around the tank in general in fact. As I was staring at the mess, wishing there were an easier way, inspiration struck. Why don’t I just lay cardboard over the weeds behind the hollow logs and cover it all with gravel? It would make it look neat and reduce the fire hazard as well. That will have to wait until I can go and get some gravel.

The hollow logs were easy to fix. I dug out the old soil and mixed it with pig poop and lime, then shoveled it back in. Once the beds have settled down and composted a bit more I will plant some herbs in there, I will probably have to fence them off too, because everything wants to eat anything newly planted.

BC7C1DDF-B25F-470A-B368-E175CA167B27

B6F6525D-6E63-40A5-895F-788D4D10788F

All inspired by this bit of progress, I decided to build a new Hugelkultur bed in the front yard. This area used to have a trellis made from a couple of bed bases tied to poles and some tires planted with choko vines, unfortunately the ducks managed to break into the choko vine covers and ate the lot. So the whole mess sat, doing nothing for a year or so; the chooks dug the soil out of the tires, the trellis fell down and the grass grew over the lot. Time to jazz it up a bit.

33AFE5FB-FABD-4032-A886-916B46C42BA6

First I needed to put the trellis back up. A couple of pieces of scrap metal about 1.5m long and a star picket later I had a trellis again, of course the zip ties helped too (what did we do before zip ties?). Sometimes I am so thankful we are too lazy to take stuff to the dump.

0C4AE10A-AF8D-44A8-A1A3-0D1F75A279B0

Now for the garden bed. Time to collect wood and bury it in pig poop…fun.

I gathered branches and stray bits of wood from all around the humpy for a couple of hours. Thanks to my trusty wheel barrow I can collect quite a large amount in a trip. Then I filled the gaps in between with partially composted pig poop from the conveniently placed pile up the hill (thanks Lucille), remembering to sprinkle the whole lot with lime periodically (which helps reduce the smell and adjusts the pH from acid back down towards neutral).

This new bed is going to take a while to settle down into a rich, fertile growing area so I need to gather plenty of mulch to cover over the pig poop and reduce the smell. Mulch also gives a bed that finished look, whether it is finished or not.

Now for the present day photos…

Nothing really likes to grow in the log bed, but the zucchini really go well in the compost in the bed in front of the log. Everything is in pots at the moment because it is easier to water everything with our second use water.
The bush beans seem to love growing in the log on this side.
We moved the aquaculture set up to the shaded area near the humpy so that A****e wouldn’t cook. The pots with herbs and veges are our way of keeping a bit of green about.
The new Hugelkultur be became a compost heap that was over a metre high. It has broken down really well and is ready for seedlings as soon as we get some rain. The tree in the middle of it is an Elder, I hope to get berries from it one day.

Yes, our humpy is a place of half-assed half-finished projects, but we have a lot of fun doing it and what else is life for, if not to follow your joy? We are messy people, you won’t find much order here, what you will find is interest and new ideas (sometimes the same new idea that has been long forgotten and then suddenly rediscovered). I do love my life!!

Home Biogas system – a BIG step forward (part one)

We have been trying very hard to move away from using gas to sustain our daily life. We have historically used gas for running the fridge and for cooking and heating water on the gas stove. Recently we have upgraded our gas fridge to an electric fridge (solar powered) and now we are adding a biogas unit to the mix. This means that we will no longer have to buy gas bottles (yay!!), this is the final step away from using bottled gas.

Bottled gas or LPG (Liquid Petroleum Gas) is produced during oil refining and given the temporary nature of our supply of oil on this planet, we need to be looking at ways to move away from our reliance on it (not to mention the huge environmental cost of using it). LPG contains propane in Australia, in other countries LPG can be a mix of propane and butane.

Biogas captures methane and carbon dioxide (methane mostly) as a result of decomposition of organic matter. That is why the discovery of methane on Mars was such an exciting thing; where there are dead things there were once live things (usually, although not always and probably not in this case). I became interested in biogas many years ago (after watching an episode of The Good Life) and decided to work towards setting it up in our humpy. The idea that we could use our waste (of all descriptions) to generate some of our energy needs was very exciting.

The idea has been sitting on a dusty shelf at the back of my mind for years. Other, more attainable, goals have been on the work table of my mind. Six months ago (approximately) I stumbled upon a post advertising a biogas system designed for home use and the idea suddenly moved to the front of my mind again.

We eventually decided to go with a Home Biogas unit from Quality Solar and Plumbing

They are the only company selling these units in Australia and they are relatively close to us (only about three hours drive way). We saved up (in tiny increments) and finally, with a windfall of back pay, we ordered the unit. We also managed to add a toilet unit to the order. As soon as this unit is set up we can start to generate our own cooking gas (although the Year three student who lives in my head can’t help making jokes about cooking with farts).

As soon as the order was placed we realised we needed a site for the future toilet/gas generation unit. Then we need a shed or some kind of building to house the toilet and a pad for the gas unit to sit on.

A gratuitous ocean shot from our long journey to Mullumbimby to pick up our biogas system.

The first part of our biogas adventure was picking it up and touring a working unit while we were there. The very helpful Brian at Quality Solar and Plumbing gave us a tour of the biogas unit he has set up at his house.

This is the working unit. It was really exciting to see one working.
You put the food scraps or animal manure into the black pipe at this end…
and gas and fertiliser come out this end. How amazing is that?
This is the stove unit that comes with the kit. There is no smell at all to the gas and this burner obviously gets a lot of use.

We have our unit home. It is sitting in it’s two little boxes, waiting for us to make it a home and set up the toilet. I can’t wait to get it going.

The two boxes in the car constitute the entire kit. I was amazed at the small size of the whole thing and how light it was to haul around. It will be much heavier once the bottom of the digester is full of water.

The kit is supposed to include everything we need to put it all together. We will see…

Use gum leaves in the garden- part two

The gum leaves on the path idea seems to be working so far; my plants are still growing and the weeds on the path are mostly suppressed. I have been slowly raking up leaves from around the humpy and spreading them on the path over old newspapers and cardboard boxes. The weeds at the unfinished end of the path have grown to be the same height as the plants in the bed, but I am making progress slowly. I start by slashing the tallest weeds down with a shovel then lay newspaper over them as thickly as possible. Finally the raked up gum leaves are dumped onto the top and spread out with the shovel.

20180106_172252[1]

You can see where the path ends at the moment and the height of the weeds in the remaining bit of path. This photo was taken from the doorway to the garden.

20180107_102222[1]

This photo was taken from the other door (to the north)

20180107_102316[1]

A close up of where the leaves end and the weeds begin

20180107_102625[1]

It’s hard to tell, but there are vegetables in there; tomato, beans and basil

Despite the messy looking garden, I am still picking food from the space. The gum leaves seem to be slowing down the weeds enough for me to stay ahead of them on the path I have already covered. It isn’t really clear whether the leaves are allelopathic or not because the weeds are suppressed by being covered (no light) and having restricted water (the leaves make a water resistant mat) as well as any possible allelopathic effect.

20180106_172449[1]

Walking onion, basil, silver beet and zucchini from my messy garden


My seedling raising area is powering along too. Initially I didn’t cover the seedling with a sheet, but I  soon found out that wet sand, hot sun and no shade led to cooked seeds and no seedlings. Now I have an old sheet draped over the whole thing the seedlings are just jumping up.


Using gum leaves in the garden

It is really hot at the moment, so the fire danger level is high. I am raking up leaves from around the house at a rate of one or two 20 litre buckets a day (and fighting a losing battle). Summer solstice (or Litha) is when gum trees drop a lot of leaves and shed their bark like a Hollywood actress shrugging out of her overcoat to reveal she is naked underneath. All that newborn bark is exceedingly beautiful to look at and I love walking  in the bush and letting the cicada song wash over me like a sound ocean, but…extra fuel on the ground leads to extra fire danger.

Common knowledge says that gum leaves are no good for compost; they are allelopathic (don’t play well with other plants), highly acidic, slow to compost and hydrophobic (don’t soak up water). In fact the only thing they have in their favour is we have a lot of them, but what to do with them?. I always struggle with where to put leaves once they are raked up from the constant drifts around the house. I usually rake them away from the house and leave it at that. This year I thought I’d try something different.

20171221_082429[1]

The path in my Hugelkultur bed area is constantly sprouting weed seedlings, which I try to keep up with by pulling a handful or two as mulch  every time I go in there (not a very effective method) but missing one day means the big weeds are taller and harder to pull out and there are just too many of them. Every year I try to cover the path with cardboard as boxes come into the house, then I cover the path with something; wood chip, sand, mulch hay, etc, anything that will keep the cardboard down and can be shoveled onto the beds the following winter. This year I have decided to try gum leaves and bark.

20171221_082504[1]

You can see the multitude of weed seedlings on the path in this photo

My reasoning is that most people say the leaves will break down eventually, given a year on the ground and it is best to have the allelopathic qualities of the leaves spent on the path where I don’t want plants. Also the leaves will be broken up by the mechanical action of me walking on them often which will speed up their decomposition somewhat. I can add a high nitrogen source like urine to the path to further speed decomposition (pardon the indelicate reference) and dampness provided by the infrequent watering of the garden and rain will also speed the process. When I add the resulting leaf mold to my garden beds I will have to remember to add some lime with it to counteract the acidity of the gum leaf mold. This is an experiment to see if gum leaves can be useful in soil building, I am not sure whether it will work out well or be a failure, but we will see in six months or so.

In other news;

My Hugelkultur beds are growing well. Here are some photos to prove  it.

20171221_082441[1]

The zucchini are flowering

20171221_082445[1]

The tree tomato is growing new leaves (it isn’t really this pale, it’s just the camera)

20171221_082458[1]

The chia is growing so fast you can see it

20171221_082500[1]

I am picking lettuce and a tiny bit of silverbeet from this bed

20171221_082512[1]

The beans are up at last and the tomato is ready to be tied up (I’m not sure I will do it though)

20171221_082501[1]

I  have continued to build up the beds that were very low on organic matter by adding anything that comes to hand; horse and cow manure collected from beside the road, the contents of the rabbit litter box and any weeds I pull from the garden.

20171223_092954[1]

Building up the bed ready for planting…probably in winter now, unless I can get some late corn in soon

20171223_092913[1]

The rabbit litter tray; the litter is compressed paper pellets which soak up water and break down very fast, also rabbit poop, pee and hair

Mowing the lawn with sheep

The lawn has become a bit wild over the last storm season; with waist high grass in some places. In contrast outside the home yard is mowed like a bowling green to a distance of 30 metres or so. The reason for this is sheep. My girls (and now three boys too) mow the fire breaks for me by simply doing what sheep do; eat, poop and do complex mathematical equations in their head while chewing cud. The sheep have not been allowed into the yard for months because when they are in there they eat everything they can get their hooves on; the vege bed in an old trailer, anything in pots, fruit trees and I have even caught one licking the rabbit (she looked very guilty when I caught her). However, the lawn needs mowing…so I have put wire covers around the trees, moved the pots and let the vege bed go to seed, something may survive.

This is the edge of the driveway outside the yard. You can see how low the girls keep the grass (except bladey grass)
Kraken hiding by the pond

Yes, it’s a mess. No excuses, I just got lazy

Using sheep to mow the lawn is hardly a new idea; lawns were around long before mowers were, in fact lawns were created by the grazing of animals around a building. There is even a landscaping feature designed to prevent livestock from straying onto the garden while they mow the lawn, called a Ha Ha wall. Paris (the city in France, not the socialite) began the move back to sustainable lawns last year by introducing rare breed sheep as lawn mowers in some parks, if it proves efficient, the system will be extended into the city (and beyond).

Woodrow Wilson used sheep to mow the White House lawn during World War 2

The girls look a bit ragged at this time of year, they are in the process of shedding their wool.

So I am continuing, or rediscovering, an ancient practice which feeds the sheep, trims the lawn and fertilises the ground. If only I could train them to stay away from the garden plants all would be perfect.

Carrot and Potato towers; growing potatoes in small spaces.

 You guessed it…..as I am largely immobile due to my knee injury I decided to go through my photos for the last few weeks and update all the posts I planned but didn’t get to.

Carrot towers
The carrot towers have been disappointing so far; the carrots haven’t grown at all and many have died. I’m not willing to give up on the idea yet though. Some of the possible causes of the failure are;

  • Transplanting the carrots (they don’t really like to be moved) or transplanting them too young.
  • Over watering (I admit I went overboard on the watering because they were right beside the door)
  • No morning sun.
So next time I will either plant advanced seedlings, or seed into the tubes and I will move the whole thing to a spot that gets morning sun.

The carrots have not grown at all.

The marigolds around the bottom look great though.

Potato towers
I have had some success with potato towers though. The basic theory is the same as the carrot towers except all the growth comes out of the top of the tower and the height allows the plant to form many more potatoes than it could in the ground.
The potatoes surrounded by compost which is kept inside the wire tube by a newspaper lining.

The potatoes are planted into cardboard boxes full of compost to reduce grass invasion.
Each tower is planted with two potatoes, I have Desiree and Kipfler  potatoes in this year.

Dry days of spring and Hugelkultur update number two

The hot, dry, windy months of spring are here. I am using lots of water on the garden and there is no rain in sight to refill the tanks. I water the garden with the water from the washing (about 160 litres a week) and from the chook and sheep water buckets when I refill them (about 30 litres); I also use about 20 litres a day straight from the tank to water the seedlings and potted plants. I am happy to be re-using the water from the washing and animal waters but I think I need to start putting a plug in the bath when we shower too, so I can scoop it out and water more. This drying wind really affects the vegetables.
In an effort to save my seedlings and tender plants, I have been covering the seedling hardening off area with old sheets to conserve water and provide a little shade. 

My seedling raising area.

Happy seedlings in pie trays to give them time to soak up the sprinkle I give them every day.

In the Hugelkultur beds everything is growing well. I still only water these beds once a week with the washing water (about 80 litres). This bed badly needs re-mulching to further conserve water (that is my goal for this week).

I know it looks dry, but the soil under the plants stays reasonably damp.

In the hugelkultur beds I have……
zuchinni

Roma tomato, just little fruit at present.

Cabbage

brocolli, just starting to bud.

And good old silver beet.

The trailer bed has broad beans and some really late snow peas; so I covered it to provide some protection from wind and sun. We might get lucky and get a crop.

The heirloom lettuce in the trailer bed is going well and we eat off it every day.

We are looking forward to beetroot soon, but in the meantime the leaves are added to stir fry and salad (when my partner isn’t looking)

Hugelkultur update

The Hugelkultur beds (stages one and two) have been in for a month now, so I thought it was time for an update.

The beds themselves look great; there has been minimal sinking and the soil below the mulch layer is moist despite only having been watered twice and rained on several times. So the moisture holding capabilities of this gardening method are proving to be exceptional.
The seeds of beans, peas, tomato, lettuce and cucumber have failed to come up so far, that could be the age of the seeds though. The seeds of grain amaranth and fenugreek that were strewn over the beds as a green manure crop (and to clear them from the seed packet container) have sprouted extensively so there will be a carpet of green on the beds within the next month, which should help to hold the soil together and prevent too much erosion if we get the wild spring storms common to our area.

You can’t tell from this distance..but things are stirring in there

One tiny plant coming up….possibly a tomato

I also bought some seedling in from our local nursery; broccoli, cabbage, zucchini , tomato and lettuce. I planted these out in the Hugelkultur beds too and so far they are doing Ok.

Zuchini in the Hugelkultur beds
Cabbage in the Hugelkultur beds

I have also had some success with planting in the trailer bed; with everything I have planted in there growing wildly.

Strawberries are going well in the old trailer bed

The broad beans are trying to make up for a slow start by growing really fast

Some late calendula is growing well, destined to be ointment one day

 So that is the extent of my garden at the moment.
Work continues on stage three of the Hugelkultur bed and on the half tank herb bed; both of which are still at the ‘collect a heap of old wood’ stage. I try to collect at least one wheelbarrow full of wood every day I have at home, but have been sadly lax lately. The beds will be built, even if it takes until next school holidays.